
Cloud-based services like Google Drive and Dropbox can be great ways to have students submit assignments. When students submit work online, you have a digital file that’s hard to lose (and they do too), the file is accessible almost anywhere, and its timestamped.
In the past, I’ve used Google Drive as a place for students to submit counterpoint assignments—which I grade digitally using iAnnotate on my iPad; formal diagrams created with Variations Audio Timeliner; and most successfully, to submit prepared singing assignments that they’ve recorded on their smartphones or through their computer.
But uploading a file to Google Drive or Dropbox requires students to have an account associated with one of those services. If you’re going to have them submit assignments regularly, it’s probably worth having them sign up for a Drive account. Often enough, though, these are one-off submissions in my class, and signing up for a Drive account is more trouble than it’s worth.
A few months ago I used Google Apps Script to create a form for submitting files to Google Drive—all without logging into a Drive account. The form was designed for other purposes, but it can used to submit any kind of file along with identifying information. Your students simply visit a webpage, enter their name and any other information you want to record, and upload the file. It’s completely customizable. The files will show up in a Google Drive folder that you specify and that only you (or you and your TAs) can access.
You can try it by following this link. Submit a file and you can see the submission data here.
Assuming you already have a Google Drive account, here’s how to do it. I promise, it’s not that difficult!
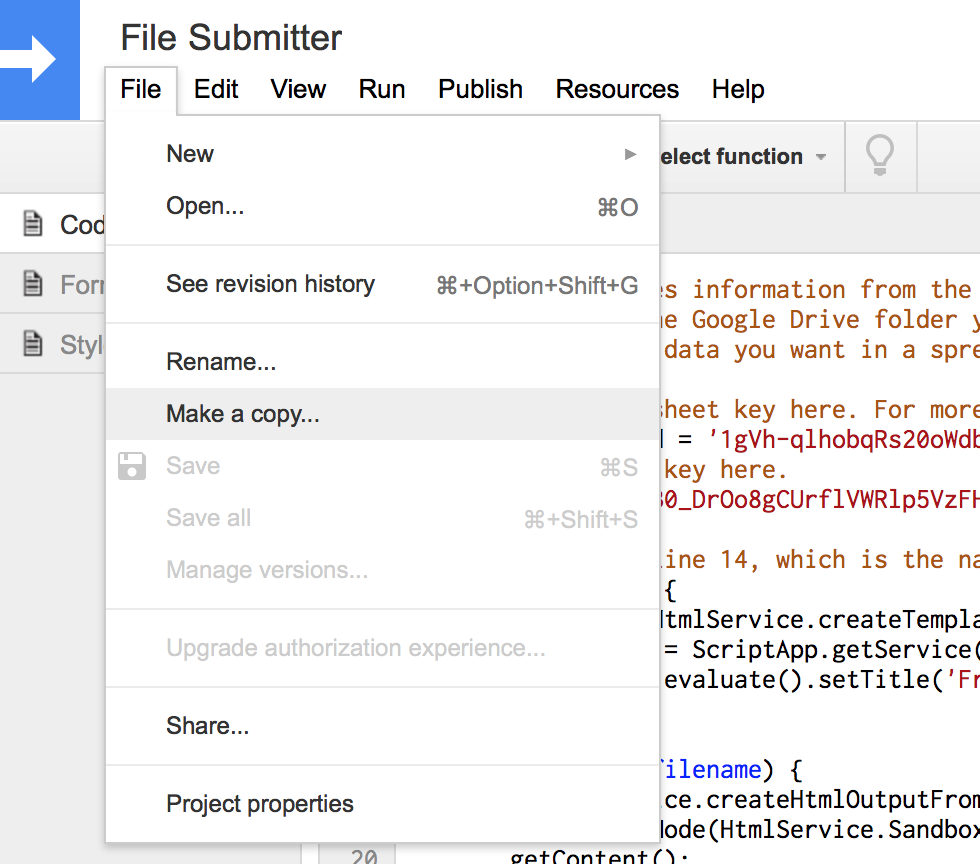
Create a copy of the script file in your Google Drive folder
Follow this link. In the menu, choose “File > Make a Copy” to save it to your Drive, and give it a name that you’ll remember.
Create a submission folder and spreadsheet
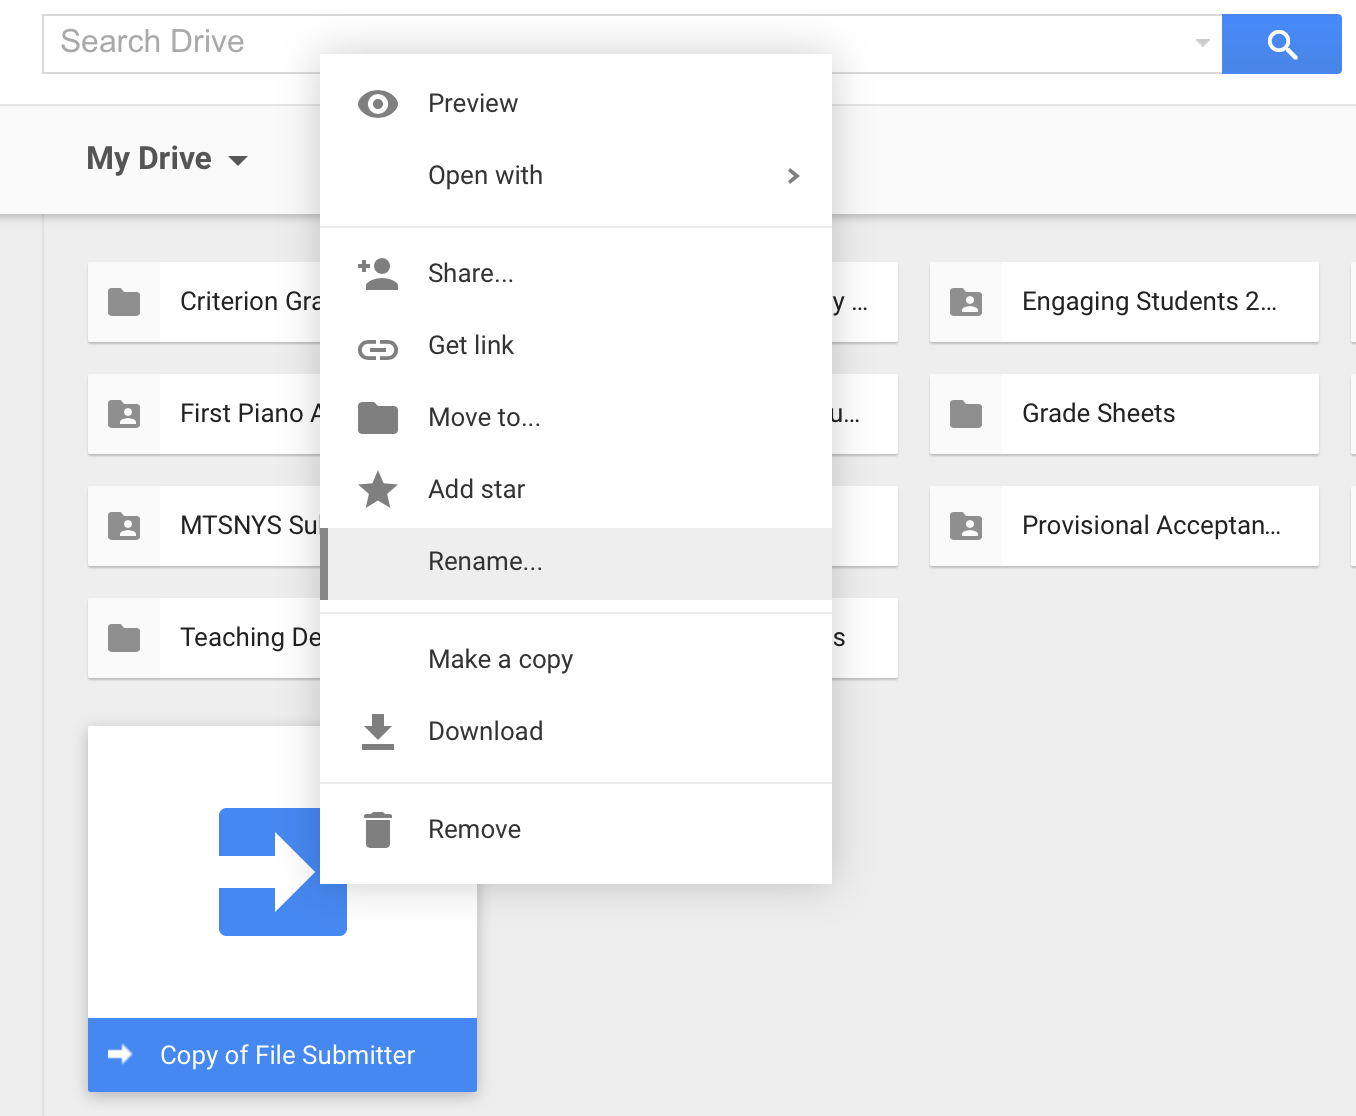
In Google Drive, create a new folder. You can name this anything you’d like, but it should be easy to identify. Drag the script file you into this folder, and while you’re there, create a new “Google Sheet” and give it a name. This sheet will be used to store submission data.
Link the script file
You need to link the script to your Google Drive and to the Submissions folder and spreadsheet you created. To do this you’ll need to replace some values in ‘Code.gs. If you’re not familiar with HTML or JavaScript, some of this will look kind of opaque. But don’t worry. You don’t need to understand it all, and there are plenty of comments in the code that will show you how to make changes.
First, open the script file, and on the left side select “Code.gs”.
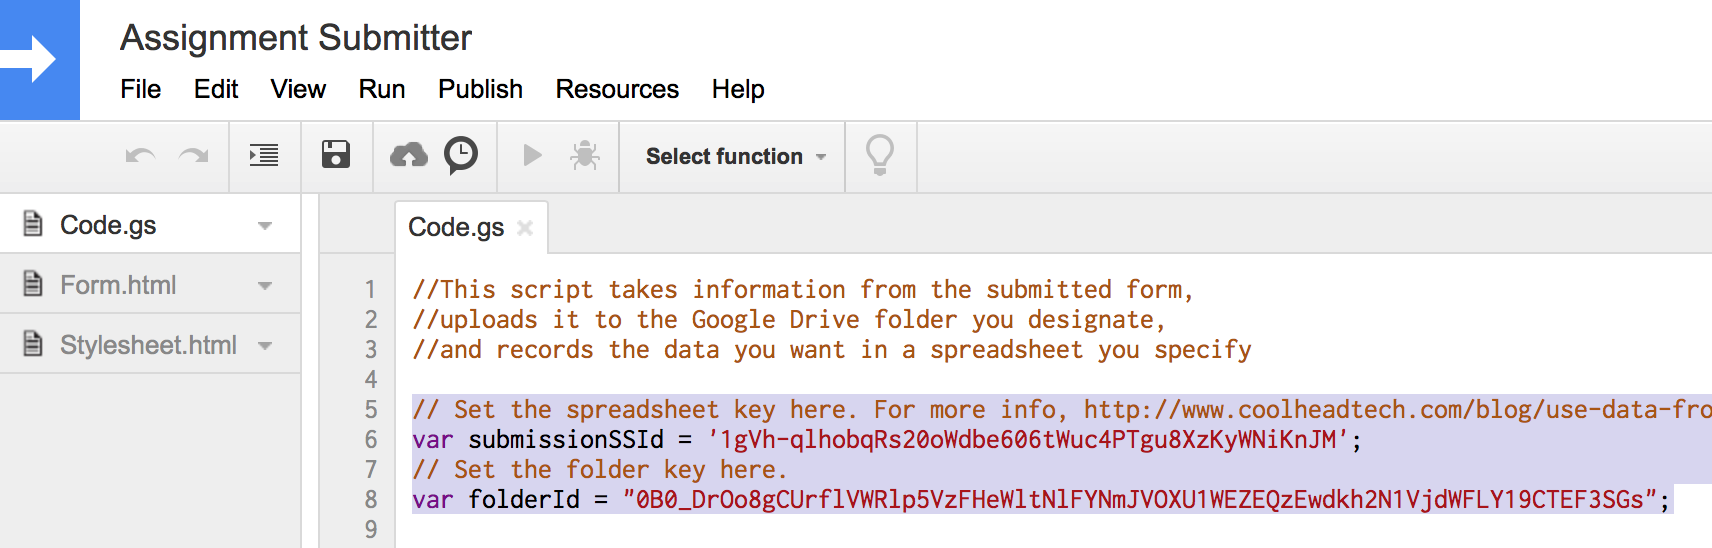
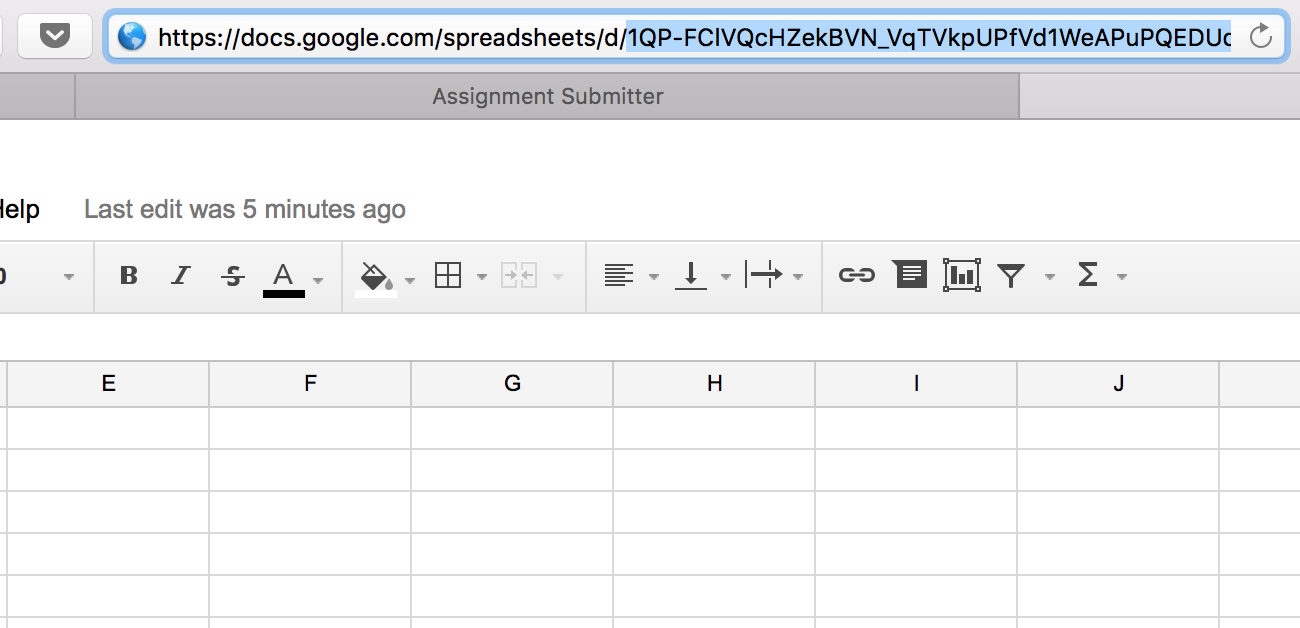
In the code block, the really long string of random characters next to var submissionSSid stores a “key” that links the script to a spreadsheet. You’ll need to replace that string with one associated with the Google sheet you created earlier. To find that value, open the Google Sheet you created. Copy the really long string of random characters after “/d/” and before “/edit” and paste it into the code.
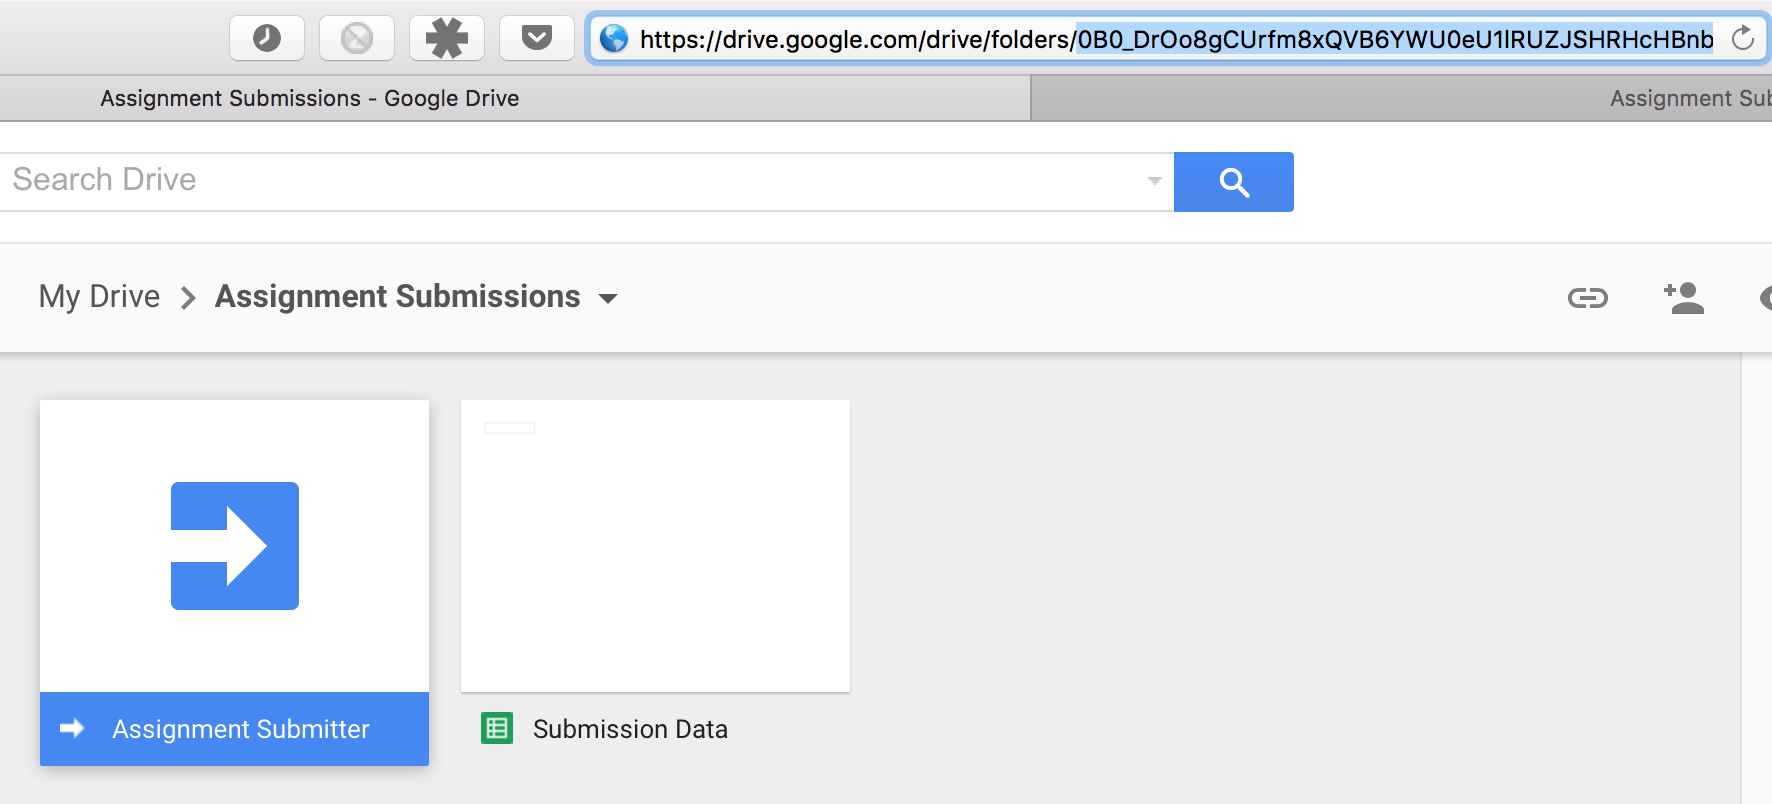
Now, you need to do the same thing to the value next to ‘folderId.’ To find the folder ID, open the submissions folder and it will be the really, really long string of random characters after “/folders/”. Again, copy and paste it into the script. You’re almost done!
Customize the script
Comments in the script will tell you how to add custom input fields. In general, changes you make to ‘Form.html’ should have a corresponding change in ‘Code.gs’. For example, if I wanted to add a input field for a student to enter their class section below the email input, make this change to ‘Form.html’:
<label>Email</label>
<input name="email" type="text"/>

<label>Section</label>
<input name="section" type="text"/>
And add this to ‘Code.gs’:
First, in the function processForm(theForm) section:
//Get the name of the assignment
var assignmentName = theForm.assignmentName;
//Get the student's name
var name = theForm.name;
//Student Email
var email = theForm.email;
//Add new fields here:
var section = theForm.section;
See how var section = theForm.section relates to <input> name="section" type="text"/>?
Finally, next to var targetRange:
var targetRange = sheet.getRange(lastRow+1, 1, 1, 5).setValues([[name,email,assignmentName,assignmentURL, section]]);Save and Deploy
Once you’ve made all of your changes, you publish the script as a web app and Google gives you a web address where the form lives. To do this, select “Publish > Deploy as Web App…”. Under, “Who has access to the app:”, select “Anyone, even anonymous,” and the click “Deploy.”
Google will ask for authorization, and you should select OK. The link you get after deploying will be where your form lives. To make changes later, just “deploy” the app again. You’ll have to create a new version.